首页
下载
文档
社区
视频
捐赠
源代码
赞助商
AOT 编译器
AI 助理
商业产品
PHP AOT 原生编译器
Swoole-Compiler 代码加密器
CRMEB 新零售社交电商系统
登录
注册
全部
提问
分享
讨论
建议
公告
开发框架
CodeGalaxy
发表新帖
PHP的FFI拓展使用笔记
# 从 编 译 C 动 态 库 到 php 的 FFI 拓 展 使 用 | 要求 | 版本| | ---- | ---- | | FFI | * | > 没有安装 FFI 拓展,自行安装 # 编写C代码 新建 `demo.c` 文件 ```c // 包含c的stdio库(根据实际情况添加文件头) #include <stdio.h> //---------------- 设置导出名 `EXPORT` (全大写可加下划线、可自定义,例如 ASD_API) #ifdef _WIN32 #define EXPORT __declspec(dllexport) #else #define EXPORT #endif // --------------- // 导出名 函数返回类型 函数名(类型 参数...) EXPORT int cAdd(int a, int b) { return a + b; } ``` # 编译C动态库 - linux 环境 > 使用`gcc`编译动态库 `gcc` 参数后面指定你要编译的文件,这里是 `demo.c`。根据你的实际情况修改 `-shared` 参数表示生成动态库。 `-o` 参数后面指定输出的动态库文件名,这里是 `demo.so`。根据你实际情况修改(必须是so文件) `-std=c++11` 参数表示这个是c++文件,编译文件格式为cc或者cpp,这里使用c所以没使用 ```shell gcc demo.c -shared -o demo.so ``` - windows 环境 > 这里使用 [tcc](http://download.savannah.gnu.org/releases/tinycc/) 编译器 根据实际情况下载 win64或者win32,我这里选择 `tcc-0.9.27-win64-bin.zip`,解压,设置环境变量 `tcc.exe` 编译器运行文件 `-shared` 参数表示生成动态库,参数后面是要编译的C文件,这里是`demo.c`。(根据实际情况修改) `-o` 参数后面指定输出的动态库文件名,这里是 `demo.dll`。根据你实际情况修改(必须是dll文件) `-x c++` 参数表示这个是c++文件,编译文件格式为cc或者cpp,这里使用c所以没使用 ```shell tcc.exe -shared demo.c -o demo.dll ``` # PHP调用C动态库 新建C头文件 `demo.h` ```h int cAdd(int a, int b); ``` 新建php文件 `demo.php` ```php <?php // 严格模式 declare(strict_types=1); // 头文件 内容 $header_file = file_get_contents(__DIR__ . DIRECTORY_SEPARATOR . "demo.h"); // 动态库文件路径 linux为so文件 windows为dll文件 $library_file = __DIR__ . DIRECTORY_SEPARATOR . "demo.so"; // 创建 FFI 对象 $ffi = FFI::cdef($header_file, $library_file); // 调用函数cAdd $add = $ffi->cAdd(1, 2); // 打印结果 var_dump($add); ``` 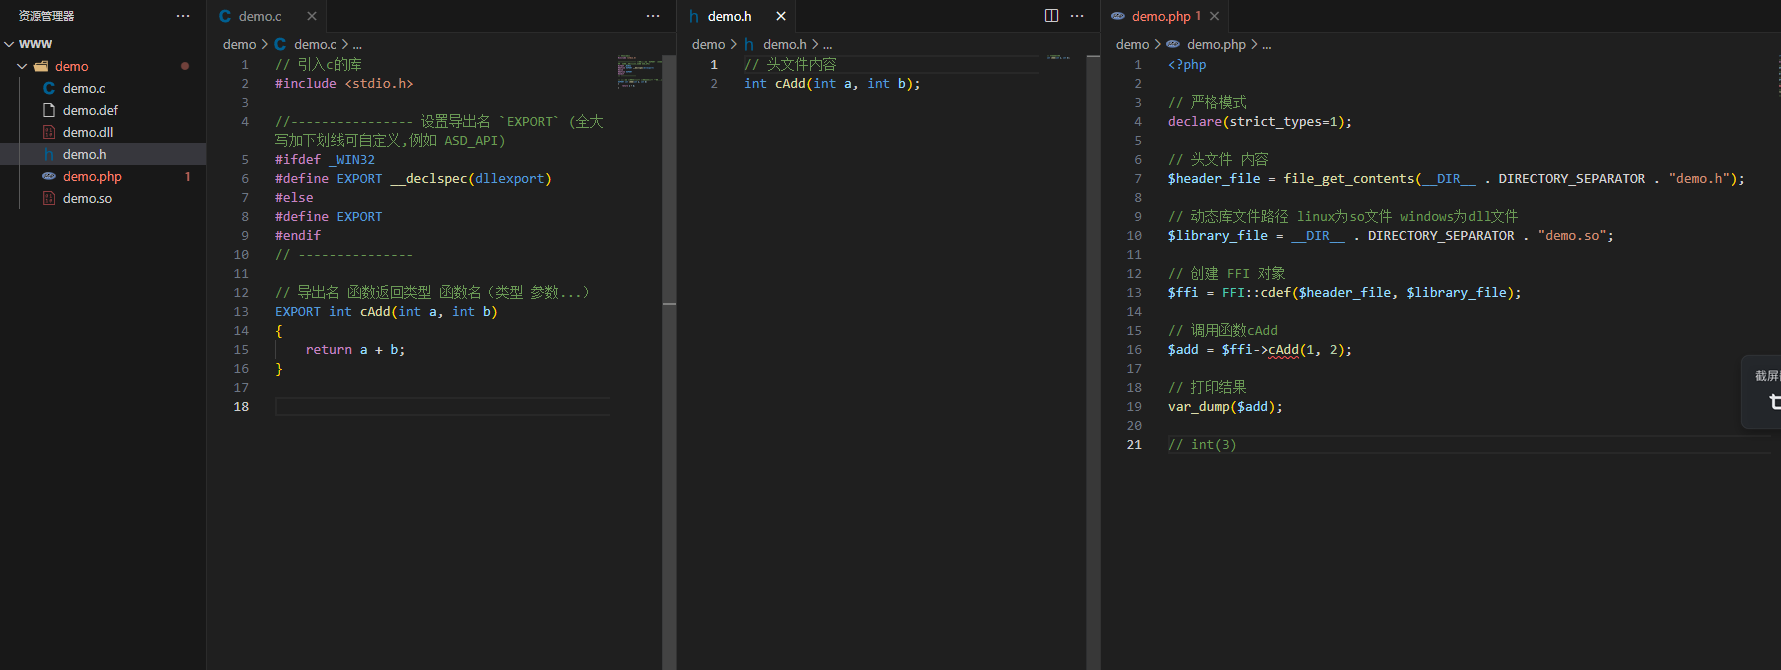 # PHP与C的类型转换 | php | c | | ---- | ----| | int | int | | string | const char *| | float | float | | double | double | | bool | bool | | null | NULL | | object | struct | | void | void | | mixed | 所有 | > 下面是一些用法 #### int C文件 ```c ...忽略 // 返回类型为int // 参数a为int类型 // 参数b为int类型 EXPORT int cAdd(int a, int b) { return a + b; } ``` h文件头内容 ```h // 返回类型为int // 参数a为int类型 // 参数b为int类型 int cAdd(int a, int b); ``` php文件 ```php <?php ...忽略 // 我传递相同类型即可 $ffi->cAdd(1, 1); ``` #### C的struct结构体类型 C文件 ```c ...忽略 // 结构体 typedef struct demo_t { int mynum; const char* str; } demo_t; // 返回类型为结构体 // 参数t为结构体类型 EXPORT demo_t cStruct(demo_t* t) { ... return t; } ``` h文件头内容 ```h // 结构体 typedef struct demo_t { int mynum; const char* str; } demo_t; // 返回类型为结构体 // 参数t为结构体类型 demo_t cStruct(demo_t* t); ``` php文件 ```php <?php ...忽略 // 直接创建 C 的结构体,$demo_t得到是一个php对象类型 // $ffi->new可以创建C的任意数据类型 $demo_t = $ffi->new('struct demo_t'); // $demo_t得到一个object /* object(FFI\CData:struct demo_t)#3 (2) { ["mynum"]=> int(0) ["str"]=> NULL } */ // 根据类型 赋值 即可 $demo_t->mynum = 12; $demo_t->str = "hello"; // 参数传递 $obj = $ffi->cStruct($demo_t); // 最后$obj也会是php的对象类型 ``` #### 面对PHP没有的类型可以用使用 `FFI->new` 函数创建 - 下面例子 C文件 ```c // 枚举 typedef enum { my_num_one = 0, my_num_two = 1, } my_enums; ``` php文件 ```php // 创建C的int类型 $c_int = $ffi->new('int'); // 赋值 $c_int = 1; // C的枚举 $c_enum_one = $ffi->new('my_num_one'); // 拿c枚举中的my_num_one,或者直接传递 int // 创建C的long类型 $c_long = $ffi->new('long'); // 创建C的long long类型 $c_long_long = $ffi->new('long long') // 创建C的int数组0~10 $c_int_array = $ffi->new('int[10]') for ($i = 0; $i < count($c_int_array); $i++) { $c_int_array[$i] = $i; } ``` #### C的函数类型传参 C文件 ```c ...忽略 // 传递一个函数且参数int a EXPORT void cClosure(void (*func)(int a)) { ... } ``` h文件头内容 ```h void cClosure(void (*func)(int a)); ``` php文件 ```php // 新建php函数,参数a为int function func(int $a){ ... } // 创建c函数 第一个参数为int $callback = $ffi->new('void (*)(int *)'); // 赋值 $callback = function($c_int){ return func($c_int); }; // 调用C $ffi->cClosure($callback); ``` # linux 编译安装 `FFI` 拓展 >当然这个是确保已经安装了 `php` 环境下 从官方下载[PHP](https://www.php.net/downloads.php)源码,解压,进入ext/ffi 目录 ```shell apt install build-essential ``` 安装 `FFI` 依赖库 ```shell apt install libffi-dev ``` 执行phpize文件 ```shell phpize ``` 配置编译选项。--with-php-config=`php-config文件` ```shell ./configure --with-php-config=/usr/local/bin/php-config ``` 编译和安装 ```shell make && make install ``` 修改php的`ini`配置文件 ```shell extension=ffi ffi.enable=true ``` 检查是否安装成功 ```shell php -m | grep FFI # 出现 FFI 表示安装成功 FFI ``` # windows 环境开启 `FFI` >当然这个是确保已经安装了 `php` 环境下 修改php的`ini`配置文件 ```shell extension=ffi ffi.enable=true ``` 检查是否安装成功 ```shell php -m | grep FFI # 出现 FFI 表示安装成功 FFI ``` # 实战项目 - [php-webui-composer](https://github.com/KingBes/php-webui-composer) 绑定 `webui` 库实现跨平台桌面开发 - [php-windows-robot](https://github.com/KingBes/php-windows-robot) php桌面自动化
发布于2年前 · 0 次浏览 · 来自
分享
KingBes
# 从 编 译 C 动 态 库 到 php 的 FFI 拓 展 使 用 | 要求 | 版本| | ---- | ---- | | FFI | * | > 没有安装 FFI 拓展,自行安装 # 编写C代码 新建 `demo.c` 文件 ```c // 包含c的stdio库(根据实际情况添加文件头) #include <stdio.h> //---------------- 设置导出名 `EXPORT` (全大写可加下划线、可自定义,例如 ASD_API) #ifdef _WIN32 #define EXPORT __declspec(dllexport) #else #define EXPORT #endif // --------------- // 导出名 函数返回类型 函数名(类型 参数...) EXPORT int cAdd(int a, int b) { return a + b; } ``` # 编译C动态库 - linux 环境 > 使用`gcc`编译动态库 `gcc` 参数后面指定你要编译的文件,这里是 `demo.c`。根据你的实际情况修改 `-shared` 参数表示生成动态库。 `-o` 参数后面指定输出的动态库文件名,这里是 `demo.so`。根据你实际情况修改(必须是so文件) `-std=c++11` 参数表示这个是c++文件,编译文件格式为cc或者cpp,这里使用c所以没使用 ```shell gcc demo.c -shared -o demo.so ``` - windows 环境 > 这里使用 [tcc](http://download.savannah.gnu.org/releases/tinycc/) 编译器 根据实际情况下载 win64或者win32,我这里选择 `tcc-0.9.27-win64-bin.zip`,解压,设置环境变量 `tcc.exe` 编译器运行文件 `-shared` 参数表示生成动态库,参数后面是要编译的C文件,这里是`demo.c`。(根据实际情况修改) `-o` 参数后面指定输出的动态库文件名,这里是 `demo.dll`。根据你实际情况修改(必须是dll文件) `-x c++` 参数表示这个是c++文件,编译文件格式为cc或者cpp,这里使用c所以没使用 ```shell tcc.exe -shared demo.c -o demo.dll ``` # PHP调用C动态库 新建C头文件 `demo.h` ```h int cAdd(int a, int b); ``` 新建php文件 `demo.php` ```php <?php // 严格模式 declare(strict_types=1); // 头文件 内容 $header_file = file_get_contents(__DIR__ . DIRECTORY_SEPARATOR . "demo.h"); // 动态库文件路径 linux为so文件 windows为dll文件 $library_file = __DIR__ . DIRECTORY_SEPARATOR . "demo.so"; // 创建 FFI 对象 $ffi = FFI::cdef($header_file, $library_file); // 调用函数cAdd $add = $ffi->cAdd(1, 2); // 打印结果 var_dump($add); ```  # PHP与C的类型转换 | php | c | | ---- | ----| | int | int | | string | const char *| | float | float | | double | double | | bool | bool | | null | NULL | | object | struct | | void | void | | mixed | 所有 | > 下面是一些用法 #### int C文件 ```c ...忽略 // 返回类型为int // 参数a为int类型 // 参数b为int类型 EXPORT int cAdd(int a, int b) { return a + b; } ``` h文件头内容 ```h // 返回类型为int // 参数a为int类型 // 参数b为int类型 int cAdd(int a, int b); ``` php文件 ```php <?php ...忽略 // 我传递相同类型即可 $ffi->cAdd(1, 1); ``` #### C的struct结构体类型 C文件 ```c ...忽略 // 结构体 typedef struct demo_t { int mynum; const char* str; } demo_t; // 返回类型为结构体 // 参数t为结构体类型 EXPORT demo_t cStruct(demo_t* t) { ... return t; } ``` h文件头内容 ```h // 结构体 typedef struct demo_t { int mynum; const char* str; } demo_t; // 返回类型为结构体 // 参数t为结构体类型 demo_t cStruct(demo_t* t); ``` php文件 ```php <?php ...忽略 // 直接创建 C 的结构体,$demo_t得到是一个php对象类型 // $ffi->new可以创建C的任意数据类型 $demo_t = $ffi->new('struct demo_t'); // $demo_t得到一个object /* object(FFI\CData:struct demo_t)#3 (2) { ["mynum"]=> int(0) ["str"]=> NULL } */ // 根据类型 赋值 即可 $demo_t->mynum = 12; $demo_t->str = "hello"; // 参数传递 $obj = $ffi->cStruct($demo_t); // 最后$obj也会是php的对象类型 ``` #### 面对PHP没有的类型可以用使用 `FFI->new` 函数创建 - 下面例子 C文件 ```c // 枚举 typedef enum { my_num_one = 0, my_num_two = 1, } my_enums; ``` php文件 ```php // 创建C的int类型 $c_int = $ffi->new('int'); // 赋值 $c_int = 1; // C的枚举 $c_enum_one = $ffi->new('my_num_one'); // 拿c枚举中的my_num_one,或者直接传递 int // 创建C的long类型 $c_long = $ffi->new('long'); // 创建C的long long类型 $c_long_long = $ffi->new('long long') // 创建C的int数组0~10 $c_int_array = $ffi->new('int[10]') for ($i = 0; $i < count($c_int_array); $i++) { $c_int_array[$i] = $i; } ``` #### C的函数类型传参 C文件 ```c ...忽略 // 传递一个函数且参数int a EXPORT void cClosure(void (*func)(int a)) { ... } ``` h文件头内容 ```h void cClosure(void (*func)(int a)); ``` php文件 ```php // 新建php函数,参数a为int function func(int $a){ ... } // 创建c函数 第一个参数为int $callback = $ffi->new('void (*)(int *)'); // 赋值 $callback = function($c_int){ return func($c_int); }; // 调用C $ffi->cClosure($callback); ``` # linux 编译安装 `FFI` 拓展 >当然这个是确保已经安装了 `php` 环境下 从官方下载[PHP](https://www.php.net/downloads.php)源码,解压,进入ext/ffi 目录 ```shell apt install build-essential ``` 安装 `FFI` 依赖库 ```shell apt install libffi-dev ``` 执行phpize文件 ```shell phpize ``` 配置编译选项。--with-php-config=`php-config文件` ```shell ./configure --with-php-config=/usr/local/bin/php-config ``` 编译和安装 ```shell make && make install ``` 修改php的`ini`配置文件 ```shell extension=ffi ffi.enable=true ``` 检查是否安装成功 ```shell php -m | grep FFI # 出现 FFI 表示安装成功 FFI ``` # windows 环境开启 `FFI` >当然这个是确保已经安装了 `php` 环境下 修改php的`ini`配置文件 ```shell extension=ffi ffi.enable=true ``` 检查是否安装成功 ```shell php -m | grep FFI # 出现 FFI 表示安装成功 FFI ``` # 实战项目 - [php-webui-composer](https://github.com/KingBes/php-webui-composer) 绑定 `webui` 库实现跨平台桌面开发 - [php-windows-robot](https://github.com/KingBes/php-windows-robot) php桌面自动化
赞
5
收藏
提问
分享
讨论
建议
公告
开发框架
CodeGalaxy
登录
后参与评论
评论
还没有评论!